|
|
|
| |
|
|
Sand shading (or
scorching),
as it’s name implies, is the art of applying
heat to veneer in order to achieve shadow and
depth in circumstances where it would not be
possible to attain the required effect by
inserting a piece of darker veneer into the
work.
Sand shading-scorching can be used to give a
smooth gradual darkening which is often
impossible to achieve just by “cutting in”
another piece of veneer.
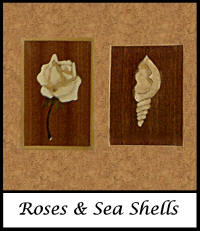
To
demonstrate the overall effect, take a look at
these examples of sand scorching (as we shall
now refer to it) shown on this accompanying
picture.
The
Roses seen here owe a lot of their realism to
sand scorching, for example, the depth and
roundness shown in the petals, this couldn’t
really be achieved with any other method. It can
also be used successfully for shadows fading
into corners, or even for scallops and sea
shells such as you can see in this other
picture.
|
 |
 |
To
acquaint yourself with sand scorching I would
advise you to try experimenting with various
veneers to see what kind of effect’s you can
achieve.
Naturally the best veneers for sand scorching
are the whiter veneers, such as sycamore, ash,
or holly, any of these veneers would scorch
well, but if you wish, you can make use of other
veneers.
Mind you
I have never had much success with the dyed
variety of veneers, they never scorch with as
much satisfaction as the whiter veneers do.
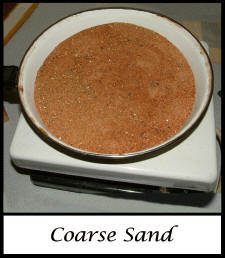
Now, we
need at this juncture, to make some observations
about the actual sand you could use.
You can
use either coarse or fine sand, I have never
found any real difference between the grades of
sand myself, although some people do say that
they think that coarse sand is the better, but
the final choice is up to your own personal
preferences.
|
|
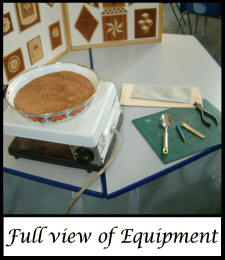
You will
want a pan to hold your sand, of which you will
want a depth of about an inch to an inch and a
half of the sand (approximately 2 – 3.5cms), you
will also need a pair of pliers or tweezers and
an electric stove (as an alternative you could
make use of a gas stove or a “camping” or picnic
type of heater). It will take a little while for
your sand to heat up this will be roughly about
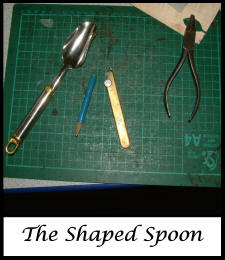
20 minutes or so. You will also be needing a
spoon (a dessert spoon is ideal for this) but
make sure it is not from your best cutlery
otherwise you’ll invite a fair bit of domestic
disharmony into the proceedings, because you
will now need to place the spoon in a vice and
squeeze the sides in so that the spoon forms a
pouring spout (as you can see in this photo).
This deformation will give you better control
with the pouring of the hot sand.
I wouldn’t advise you to
dip your veneer straight into the hot sand
because you will burn it and you will have lost
the desired effect, you will in fact have over
burnt it. There are certain exceptions to this
statement but I will be showing you them later
on when I do the trellis and the basket weave
demonstrations.
|
 |
 |
Unfortunately with very small pieces you won’t
be able to hold them and pour sand onto them,
you will of necessity be obliged to dip them in
the hot sand, but do be very careful and don’t
burn them by leaving them in the hot sand for
too long.
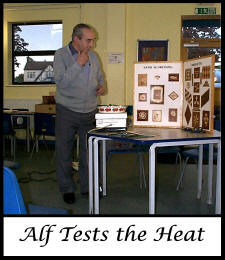
It’s
time now for some practical work, I’ll just
check the sand for heat by just letting some hot
sand rest on the test piece of veneer for a few
seconds, yes, that’s okay it’s scorching so I
will turn the heat down a little.
You will
notice that scorching has been taking place at
the sides of the test veneer, so we are now at
our correct heat.
Now when
you cut your piece of veneer for scorching you
can either cut your piece slightly oversize, or
you can cut it to fit the “window”, the choice
is yours.
Do bear
in mind that the hot sand applied to the veneer
will cause the veneer to shrink a little due to
the effect of the heat causing some of the
moisture in the wood to evaporate,
|
|
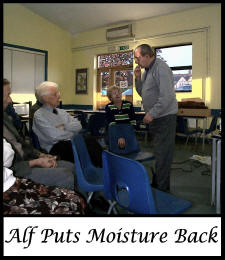
so it
will be necessary to put some moisture back into
the veneer to bring it back to it’s original
size, this you can do by just putting the
scorched veneer into your mouth, obviously, make
sure its cooled slightly otherwise you’ll burn
yourself.
If you
elect to cut your piece of veneer oversize then
it will only be necessary to trim your veneer to
fit your window and then you will avoid having
the taste of scorched veneer in your mouth. I
would recommend that you lightly pencil the area
you want to scorch for your own guidance when
applying the hot sand. Don’t forget to apply the
sand to both sides of your veneer so that you
get penetration of the “scorch”.
When you
apply the hot sand to the veneer, scorch
slightly over the area you require, because you
will lose some of the scorched effect when you
come to sand your picture down. You cannot
really get the scorching effect with dark woods,
for example, a walnut, you can try sand
scorching if you wish but you are not going to
make hardly any impression on it at all. If you
use a light walnut, it could perhaps be used to
depict a corner of a room or ceiling.
Now, if
you have a fair number of pieces to scorch, just
scorch a few of these first and put them back
into your picture, then do another few and put
them in your picture, and carry on with this
procedure until you have done all the pieces you
wanted scorched for your picture.
|
 |
 |
A question from the audience: “You don’t
moisten the veneer until after you’ve scorched
it Alf?” “Yes, that’s right, now if you assume
that the piece of veneer you’ve just scorched is
going back into your picture, you’ll probably
find that there is now a gap around it even
though it fitted perfectly before you scorched
it, this will be due to shrinkage caused by
moisture loss because of the effect of the hot
sand, now you can overcome this problem by
applying a little moisture, even the white PVA
glue will help the situation. If you are not
happy with this shrinkage problem you can
overcome these drawbacks by just cutting your
veneer oversize, sand scorching it and then
cutting it into your window in the normal
manner”.
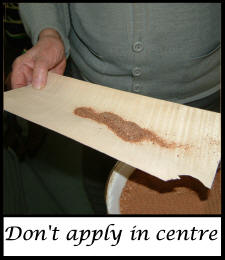
Do not try placing hot sand into the middle
of a leaf of veneer because it will start
curling up and you will be unable to do anything
of any practical use with it.
I must say that I’ve not had any real success
with chemically treated veneers either. You can
sometimes see a light scorching taking place,
but it in no way compares with the depth of the
effect you get when you scorch the white
veneers.
|
|
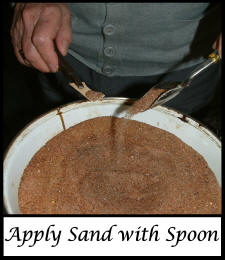
Now do bear in mind that the sand in the
centre of the tin is going to be the hottest, so
don’t go plunging your veneer into that part of
the hot sand and then after a while bring it out
from that part of the sand only to find that you
now have a charred piece of veneer, it is far
better to control the application of the hot
sand by pouring it on your veneer with the
spoon. As I said before, with small pieces you
will not be able to do that, but with your
larger pieces do use the spoon to apply the sand
onto your veneer, leave it for a few seconds
then pour the sand back into the tin. You can
repeat this process until you’ve achieved the
depth of scorching that you require.
If you take a look at the roses on the
demonstration board you will find that they’ve
scorched just right, they show about the right
amount of shadow and depth, after all, you do
not want the wood blackened by over doing the
amount of scorching.
|
 |
 |
Alf: “anyone like to have a try?”
Vicky volunteers.
Alf:
“I’ll just check that the heat’s okay for you”
Vicky now applies some hot sand to a piece of
test veneer by using the spoon method.
Alf:
“there you are, you can see the discolouration
taking place, now turn it over and do the other
side, ------ there, that’s now a sufficient
depth of colouring”
Dave Walker:
“don’t forget to place the veneer in your mouth
to resize it!”
|
|
A question from the audience: “Can I dip the
piece of veneer into water instead of placing it
in my mouth?” “Yes, but do not let it soak, test
it out on a spare piece of scrap veneer first,
or use the other alternative of cutting your
veneer oversize”
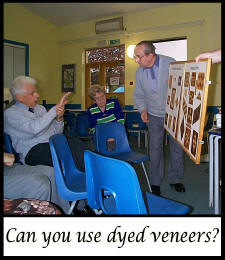
Another question from the audience: “Can you
use coloured dyed veneers?” “I have, as I said
previously, never had any success with dyed
veneers, but do try experimenting with these
types of wood because you may be successful”
There is one wood I would not recommend you
to use, and that is Paduak, this is a red wood
and it bleeds its colour very easily, when it is
scorched it just crumbles and you just end up
wasting your time and your materials. As I said
earlier, the best results are obtained with the
use of the white woods, sycamore, holly, horse
chestnut and ash to name just a few. But do
experiment because it is all a case of trial and
error. It is well worth the effort and the time
you put into getting yourself the desired
effect.
|
 |
 |
A further question from the audience:
“What sort of sand do you use Alf?” “I use any
sort of soft or sharp sand. I think this is
actually sharp sand that I am using for this
demonstration. Many people say that they find
sharp sand is the best”
Another question from the audience:
“A lot of the secret of it Alf must be the
amount of heat you put into the sand?” “It takes
roughly about 20 minutes to heat the sand, you
can easily get the sand too hot, so do a test
with a scrap piece of veneer before you commit
any of your picture veneers to the hot sand, one
last point though is don’t leave the spoon in
the hot sand while you are scorching otherwise
you’ll end up not only scorching your veneer,
but you will burn your little marquetarian’s
fingers into the bargain when you go to pick up
the spoon again!”
|
|
An
over heard remark from Harry Heyford to
Derek Batts: “I do the sand scorching in
my shed, I bought a little Calor gas
burner and I use it down there” “What,
did you set the shed on fire?” “Well,
yes, but……..”
|
|
Final applause from
the audience.
End of the Lecture.
Alf's next lectures
in this series will cover the topics of
Trellis and Basket weave
|
|
Next
Lecture >
|
|

